Baked French Toast

I have always loved to wake before anyone else in the family is up. There is something about getting up in a quiet house and having even just a few minutes to stand at the bench or sit in my favourite chair, often just staring out the window while I wake up enough to make my coffee. No questions, complaints or arguments.

Just me, my thoughts and my warm coffee cup.

I have started doing it again lately, as we have all been 1000% together 1000% of the time. Oh the joys – and the constant-ness of constant company.

Sound familiar? I think what started as a feeling of ‘Yay, everything’s cancelled, let’s bunker down and have lots of QUALITY TIME TOGETHER’ has turned into a daily battle of choosing to keep ‘bearing with one another in love’ as the days together turn into weeks and months, with little connection from others or change in scenery.

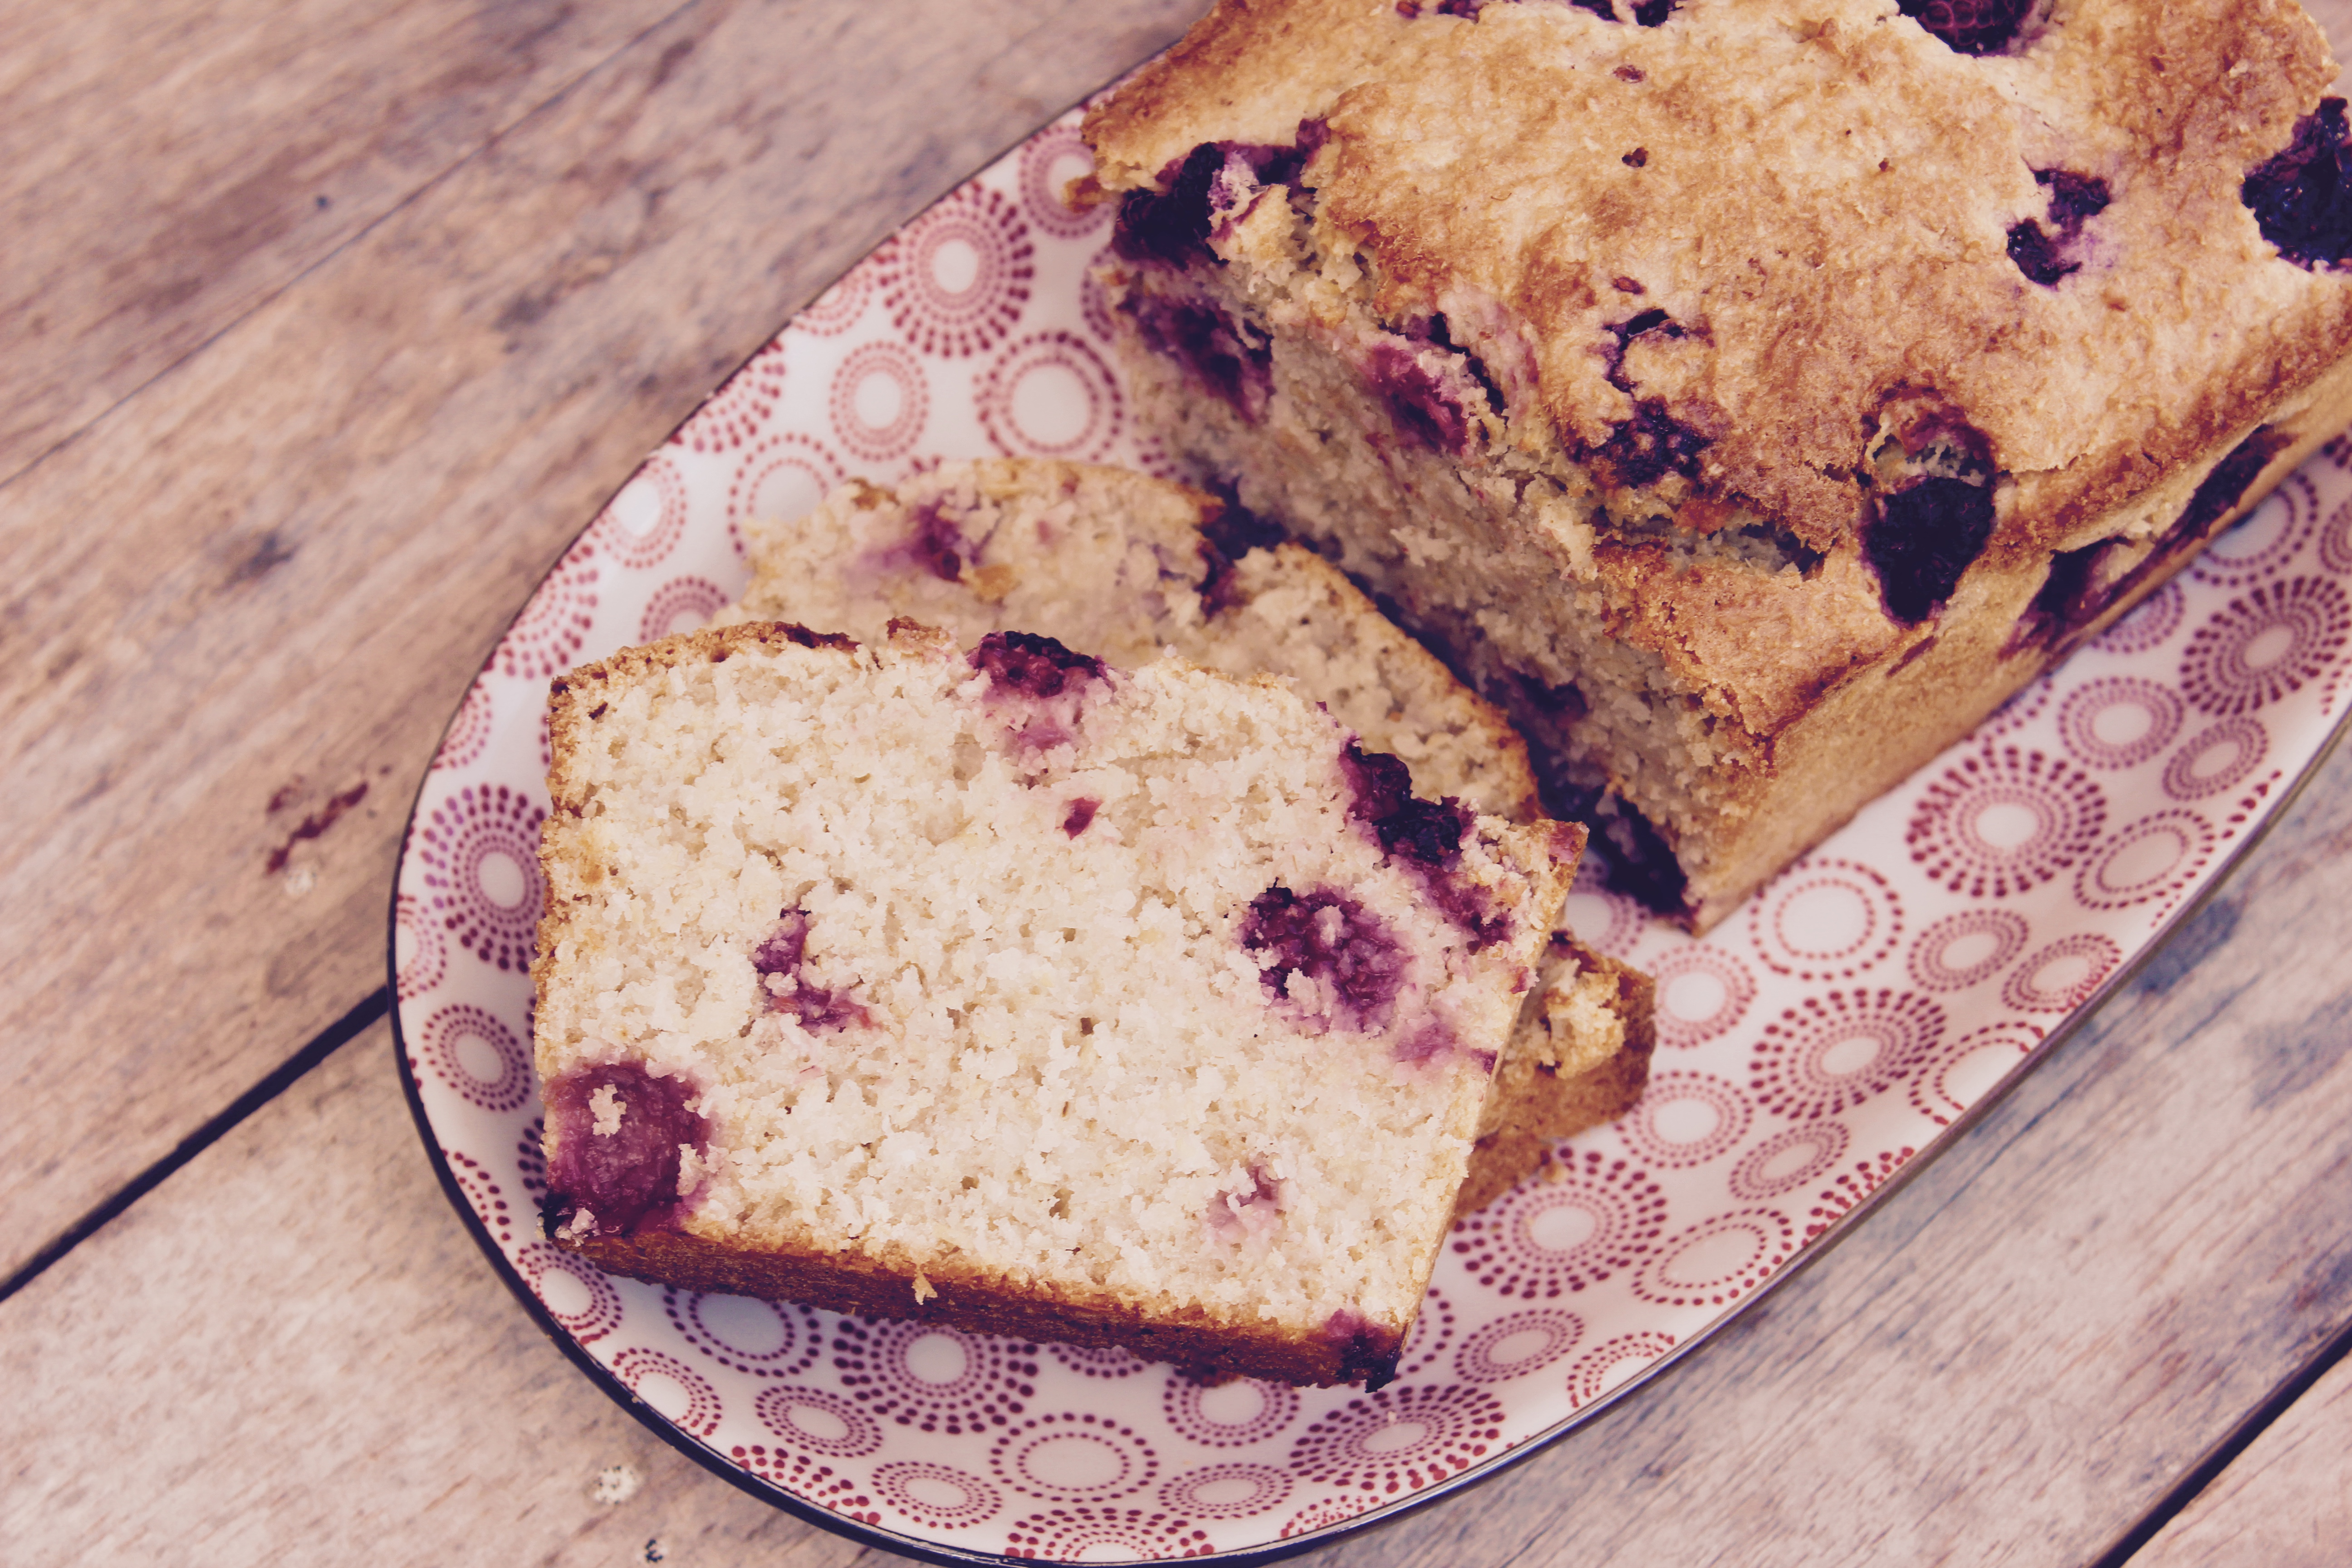
So it was in the stillness and quiet of last Sunday morning, coffee in hand, that I popped this beauty in the oven. I love any recipe that can be prepared in advance, and this one is all the better for a night in the fridge – bread soaking and flavours developing as I sleep.

I love this recipe as it has no added sugar other than the small amount for sprinkling across the top and the maple syrup on the base of the dish. There are many versions of this recipe out there, and most contain unnecessary cups of added sugar!

You will be pleased to know I had a whole hour to myself reading and drinking coffee in the quiet while the family was sleeping and this deliciousness was baking away in the oven. I think it was the smell of it baking that got most of them out of bed in the end.

Baked French Toast

Serves 4-6

Recipe adapted from Bills Basics, by Bill Granger

Ingredients

  • 4 eggs
  • 1/2 cup cream (use milk if you don’t have cream)
  • 2 1/2 cups milk
  • 2 teaspoons vanilla extract
  • 1/4 cup maple syrup
  • 8-10 slices of day old bread – I used a loaf of fruit sourdough, but you can literally use anything, even old bits and bobs of bread from the freezer.
  • a handful of fresh or frozen raspberries, optional (or any berries you have on hand)
  • butter for greasing
  • Demarara Sugar (or raw) for sprinkling

Method

  • Grease a medium size rectangle baking dish with butter
  • Pour maple syrup on base of dish
  • Lay slices of bread in dish, over lapping the slices slightly to fit it all in. Keeping the crusts on and having some pieces not submerged makes for a crunchy topping and yummy texture.
  • Whisk together eggs, cream, milk and vanilla and pour evenly into the dish.
  • Scatter with berries if using.
  • Cover and place in the fridge overnight.
  • When ready to bake, remove cover and sprinkle with sugar. Demarara gives it a crunchy caramel finish, raw sugar is a perfectly fine substitute.
  • Bake at 180 degrees celsius for 50-60 minutes, or until golden on top and custard is set.
  • You can either eat it warm or at room temperature, on it’s own, or with your yoghurt of choice, creme fraiche or thickened cream.

ANZAC Biscuits

I think I have finally found my favourite ANZAC recipe. 

Like most Australians, I have grown up cooking from the Women’s Weekly cook books and for many years, their recipe was the only one I used. 

But in a quest to lower my families sugar consumption over the past few years, I have been on the look out for a recipe that would still taste and feel like an ANZAC, without the standard 1 cup of sugar per batch.

Enter Matt Moran’s recipe, from his beautiful cookbook ‘Australian Food – Coast and Country’ . Gifted to me last Christmas from a good friend, I have finally found some time to read it cover to cover, ear marking recipes to try and enjoying the beautiful photography of Australia’s sparkling coast lines and rugged countryside. 

This ANZAC Day we find ourselves tucked away at the farm, resting from our work and school lives and enjoying fresh air, many card games, walks and long sits by the fire. 

For many years I use to struggle with the change in pace when we went from frantic life to quiet farm days – feeling a little out of sorts and twitchy when a day stretched endlessly in front of me with nothing really to do or nowhere to be.

Fast forward to this mid season of my life, and I can no longer live without these types of mini breaks. Different to sight seeing holidays in exotic destinations or breaks away with friends, (both of which I love), family time away without a schedule is teaching us all to embrace boredom, resting, going slow and living in the moment, as opposed to the busy and distracted living we often get caught up in. 

I hope wherever it is you find yourself reading this, you find a way to carve out some time for rest….. and just maybe popping a batch of these in the oven too. 

ANZAC Biscuits
Yields 20
Crunchy on the outside, chewy in the middle, this classic aussie biscuit is full of oats and coconut with golden syrup giving it a caramel flavour.
Write a review
Print
Prep Time
10 min
Cook Time
20 min
Total Time
30 min
Prep Time
10 min
Cook Time
20 min
Total Time
30 min
Ingredients
  1. 1 cup rolled oats
  2. 2/3 cup plain flour
  3. 1/3 cup castor sugar
  4. 1/2 cup desiccated coconut
  5. 1 teaspoon bicarb soda
  6. 1 1/2 tablespoons warm water
  7. 125 grams unsalted butter, melted
  8. 1 tablespoon golden syrup
Instructions
  1. Preheat oven to 150 degrees celsius.
  2. Line 2 baking trays with baking paper.
  3. Combine oats, flour, sugar and coconut in a bowl. Stir until combined.
  4. Combine bicarb soda and water in a small bowl.
  5. Add to the dry ingredients, along with the butter and golden syrup.
  6. Mix well.
  7. Place a heaped teaspoon full into your hand and roll into a ball, place on the tray and press down each one to flatten a little.
  8. Leave room for spreading.
  9. Bake for 15-20 minutes, or until golden brown.
  10. Leave on trays to cool.
  11. Store in an airtight container.
Notes
  1. Cook one tray at a time to get an even colour, or alternatively, swap your trays around after 10 minutes of cooking time.
Adapted from Australian Food
cook fast eat slow https://www.cookfasteatslow.com/
 

Raspberry Coconut Bread (dairy free)

So I may have skipped my Monday morning gym class, just so I could go home and listen to the rain on the roof and do some therapeutic baking.  Maybe not the most sensible decision, but I thoroughly enjoyed my quiet morning and the boys are loving this Raspberry Coconut bread for afternoon tea (leftovers sliced and frozen for lunch boxes). The gym will still be there next week, I told myself, but the rain might not be!

We’ve been in our current home since November, and it dawned on us as the rain softly fell on Sunday, that this was the first time we had a rainy day in this house. 

Even the boys commented on it and how nice it was to get in a tracksuit and snuggle down on the lounge while our dry garden soaked up the goodness. 

They must be getting older.

I remember many, many rainy days when they were younger that would reduce me to tears as I struggled to keep 3 energiser bunnies happy inside. 

I had always loved a rainy day, enjoying being forced to ‘batten down the hatches’, potter around home, read, have a cuppa…..until I became a mum of 3 busy boys that is. 

Fast forward to now and thankfully some of those things I love are starting to rub off on them in small ways. 

I found my eldest son sitting on a lounge, guitar at his feet and a bowl of crackers in his lap. ‘What ya’ doin?’ I casually stated as I walked past. “Just listening to the rain” he said. No screen in sight, I silently did a ‘yippee’, without showing too much reaction, and walked on. 

Our middle son rushed to get in his tracksuit and offered to make everyone a hot chocolate. 

And the youngest loudly declared “Let’s have a family movie and cuddle on the lounge!” 

I have dreamt of days like this for a very long time.  

If they can all look like that, bring on the rain I say!

Raspberry Coconut Bread (dairy free)
Serves 10
A one bowl, moist coconut loaf studded with raspberries.
Write a review
Print
Prep Time
5 min
Total Time
1 hr 5 min
Prep Time
5 min
Total Time
1 hr 5 min
Ingredients
  1. 400 gram tin coconut cream
  2. 1 3/4 cup desiccated coconut
  3. 1 egg
  4. 2 teaspoons vanilla extract
  5. 1 1/2 cup wholemeal plain flour
  6. 2 teaspoon baking powder
  7. 1/2 cup sugar
  8. 1 cup frozen raspberries
Instructions
  1. Pour coconut cream into a mixing bowl and add the coconut. Stir and leave to sit for 30 minutes. The coconut will absorb the cream.
  2. Add the rest of the ingredients, except the raspberries and mix thoroughly.
  3. Gently stir in the frozen raspberries.
  4. Pour mixture into a greased loaf tin.
  5. Bake at 170 degrees celsius for 1 hour, or util a skewer inserted comes out clean.
  6. Exceptionally good eaten warm, just let it cool enough for you to be able to slice it.
Notes
  1. To freeze, allow to cool completely, cut into slices, and wrap individually.
Adapted from TASTE.com
cook fast eat slow https://www.cookfasteatslow.com/


Slow Cooker Meatballs

I don’t know about you, but the memories of summer holiday fun are quickly fading as the term gets back underway. 

The struggle is real for some in our house, as lazy slow mornings have given way to the school morning scramble.

On any given day I find myself at the breakfast bench whispering to myself ‘breathe, don’t yell, stay calm’ as we negotiate getting a sleepy teen moving and talk through the logistics of the day ahead with the family. 

Sigh. I was never a yelling type….until I became a mother that is. And this year, 2018, is the year where I.WILL.YELL.LESS. 

So. Here’s to less yelling in the mornings, making the school bus on time, getting to work not too frazzled and for another year, feeding our families and gathering together at the end of each day, however that looks.  

There are some solutions and shortcuts for this busy season, like prepping lunches and dinner in advance, enter these yummy easy Meatballs!  We can also outsource some house jobs, call in the family and friends cavalry from time to time to help out, but at the end of the day, there is no shortcut to raising our kids. 

It happens one busy, crazy, noisy, messy day at a time. Some of those days we can High 5 ourselves on our patience, wisdom and general awesome-ness. On many many others, we just have to know it’s enough to keep showing up and be thankful for the mercies that come afresh every time the sun rises again. 

Mums, if there’s one thing I know, it’s that we’re not going to get it right every time. I am staring down this new year already knowing it will be filled with imperfect parenting, disappointments and struggles for us and our kids. 

But I stare it down knowing that God doesn’t make mistakes and in Him, I trust and rest in full confidence knowing that I am the best mum for my kids, this season of their life is in His hands, He knows the future and it’s not my job to worry endlessly about all that I can’t control. He loves our kids even more than we do, doesn’t that just blow you away?

So bring on 2018 – less yelling, more breathing, less worry, more trust, less of me and more of the one who holds the world and our kids in his hands. 

E x

Slow Cooker Meatballs
Serves 6
Simple moist meatballs cooked in a rich tomato and herb sauce.
Write a review
Print
Prep Time
10 min
Cook Time
4 hr
Total Time
4 hr 10 min
Prep Time
10 min
Cook Time
4 hr
Total Time
4 hr 10 min
Ingredients
  1. 1 kilogram pork and veal mince (if using beef mince, use a full fat variety otherwise they dry out)
  2. 1/2 cup fresh breadcrumbs
  3. 1 tablespoon dried italian herbs
  4. 2 cloves garlic, crushed
  5. 700ml jar of passata (italian tomato cooking sauce)
  6. 1 cup of tomato puree
  7. 1 teaspoon dried chilli flakes (optional)
  8. a generous splash of balsamic vinegar
  9. salt and pepper to taste
  10. To serve, parmesan cheese, parsley, pasta and steamed greens
Instructions
  1. Combine mince, breadcrumbs, herbs and garlic in a bowl.
  2. Using hands, roll into small, evenly sized balls.
  3. Place remaining ingredients in the slow cooker.
  4. Add the meatballs and fit them in as snug as you can.
  5. It's okay if they are not all submerged, just give them a careful stir 1/2 way through cooking if that's the case.
  6. Place the lid on and cook for 2-3 hours on high or 5-6 on low. Take the lid off with 1/2 hour to go to let the sauce reduce a little.
  7. Serve sprinkled with parmesan and parsley, pasta and steamed greens.
Notes
  1. Look for a passata or pasta sauce that has herbs added in to give the sauce extra flavour.
  2. If you use a plain one, add more dried or fresh herbs like oregano and thyme.
  3. This is the perfect make ahead meal as it's flavour develops in the fridge over a day.
  4. It also freezes well.
cook fast eat slow https://www.cookfasteatslow.com/
 

Roasted Veg Salad (vegetarian)

We all have our list of ‘lazy meals’ that we go to when we can’t really bare to think anymore about what to feed the family. 

Although this salad looks a little fancy, it has become one of my ‘what to eat when I haven’t thought about what to eat’ meals. 

The beauty of this recipe, if you can indeed call it one, is that you roast whatever you have on hand or needs using up. The day I took these photos, it was tomatoes, capsicums, potatoes and sweet potatoes, and I threw some asparagus in for the last 5 minutes of roasting time.

But the options are endless – beetroot, pumpkin, leeks, onions, carrot, zucchini – if it’s in your fridge or cupboard, wash it, chop it into even chunky sized pieces and throw it on the tray. 

Drizzle with olive oil, season with salt and pepper, and scatter with  some fresh or dried herbs – rosemary, thyme or oregano are often my choice for veggies like these. 

If you cut them into small-ish chunks they should only take about 30 minutes in a 200 degree oven. 

I like to let them cool for a moment, before tumbling onto a platter of mixed salad leaves. You could leave it at this and it would be fabulous, or to snaz it up a bit, add some goats cheese or fetta. 

It is such a versatile dish – eat it on it’s own or alongside some protein like chicken, red meat or fish. 

I often try to do a little extra, because a container of these veggies, cold the next day makes for a quick and yummy lunch. 

Here’s to finding new inspiration to keep feeding our families without going mad!

E x