Raspberry Coconut Bread (dairy free)

So I may have skipped my Monday morning gym class, just so I could go home and listen to the rain on the roof and do some therapeutic baking.  Maybe not the most sensible decision, but I thoroughly enjoyed my quiet morning and the boys are loving this Raspberry Coconut bread for afternoon tea (leftovers sliced and frozen for lunch boxes). The gym will still be there next week, I told myself, but the rain might not be!

We’ve been in our current home since November, and it dawned on us as the rain softly fell on Sunday, that this was the first time we had a rainy day in this house. 

Even the boys commented on it and how nice it was to get in a tracksuit and snuggle down on the lounge while our dry garden soaked up the goodness. 

They must be getting older.

I remember many, many rainy days when they were younger that would reduce me to tears as I struggled to keep 3 energiser bunnies happy inside. 

I had always loved a rainy day, enjoying being forced to ‘batten down the hatches’, potter around home, read, have a cuppa…..until I became a mum of 3 busy boys that is. 

Fast forward to now and thankfully some of those things I love are starting to rub off on them in small ways. 

I found my eldest son sitting on a lounge, guitar at his feet and a bowl of crackers in his lap. ‘What ya’ doin?’ I casually stated as I walked past. “Just listening to the rain” he said. No screen in sight, I silently did a ‘yippee’, without showing too much reaction, and walked on. 

Our middle son rushed to get in his tracksuit and offered to make everyone a hot chocolate. 

And the youngest loudly declared “Let’s have a family movie and cuddle on the lounge!” 

I have dreamt of days like this for a very long time.  

If they can all look like that, bring on the rain I say!

Raspberry Coconut Bread (dairy free)
Serves 10
A one bowl, moist coconut loaf studded with raspberries.
Write a review
Print
Prep Time
5 min
Total Time
1 hr 5 min
Prep Time
5 min
Total Time
1 hr 5 min
Ingredients
  1. 400 gram tin coconut cream
  2. 1 3/4 cup desiccated coconut
  3. 1 egg
  4. 2 teaspoons vanilla extract
  5. 1 1/2 cup wholemeal plain flour
  6. 2 teaspoon baking powder
  7. 1/2 cup sugar
  8. 1 cup frozen raspberries
Instructions
  1. Pour coconut cream into a mixing bowl and add the coconut. Stir and leave to sit for 30 minutes. The coconut will absorb the cream.
  2. Add the rest of the ingredients, except the raspberries and mix thoroughly.
  3. Gently stir in the frozen raspberries.
  4. Pour mixture into a greased loaf tin.
  5. Bake at 170 degrees celsius for 1 hour, or util a skewer inserted comes out clean.
  6. Exceptionally good eaten warm, just let it cool enough for you to be able to slice it.
Notes
  1. To freeze, allow to cool completely, cut into slices, and wrap individually.
Adapted from TASTE.com
cook fast eat slow https://www.cookfasteatslow.com/


Chai-Spiced Brownies (gluten free, dairy free, low sugar)

Hey there….. it’s been a while I know. 

More than 3 months to be exact, since I sat and wrote to you and shared a new recipe from my kitchen. 

After posting a new recipe nearly every week for the past 2 years, I can’t believe the last 3 months have come and gone so quick. 

How have you been? 

I’ve been doing Life With a Capital L. Probably the same as you. 

I remember vividly sitting down with a cuppa towards the end of January and thinking through what was to come over the next few months and wondering How On Earth We Would Get It All Done. 

But as sure as the sun rose this morning, here I am. Sitting down in my quiet house, next to my warm fire and writing once again, with the last few months already in the past. 

There was no magic formula to managing the mayhem of the last few months. We tackled it the old fashioned way – one day at a time. 

We’ve had a few firsts in our house this year. 

My husband started a new job which has been super exciting and I finally got the courage up to enrol in a Masters of Teaching so I can take my love of food and cooking and teach it to high school students. I have been dreaming of doing this since my early 20’s, but each time I thought I about it seriously, it just didn’t seem to be a good time. 

That doesn’t mean now is a great time either. Life, Marriage and Motherhood have taught me that nothing is neat and straight forward. It’s messy, a juggle and full of lots of give and take and compromise and sometimes you just have to dive in and figure it out as you go. It dawned on me late last year that if I kept waiting for the perfect time, when all my ducks were in a row, I would never do it. 

So I am 2 subjects in and filled with excitement and sheer terror at the thought of getting through the next 4 years. I have been talking to myself a lot lately, and I am trying to follow the advice I often give the boys – don’t look too far ahead. Do what is right in front of you and tomorrow will take care of itself. 

Just to keep things interesting, we added 2  x children surgeries, 1 x child’s broken wrist, and decided to put our house on the market and sell it. 

We tackled it like any normal person would. With loads of lists, help from family and many more take away meals than I would usually admit to. Oh.. and lunch orders too. 

There was no spare time for coming up with new meal ideas or playing in my kitchen. If I wasn’t using my own website for recipes that take less than 20 minutes, I was sitting in our local shopping village, feeding the boys Subway at 6pm on a Wednesday night. 

It hasn’t been all chaos and drama. Recently we celebrated my husbands ‘special’ birthday, the one that starts with a 4….My husband loves the water, so after he spent a day sailing with a bunch of mates, the boys and I joined him for a night on a boat. It was a fun thing to do as a family after a pretty stressful few months and a great way to celebrate him. 

Despite still having uni work to do over Easter, we enjoyed a change of scenery at the Farm. A few days of rest and reflection and country air did us all the world of good. 

So that brings us to today. 

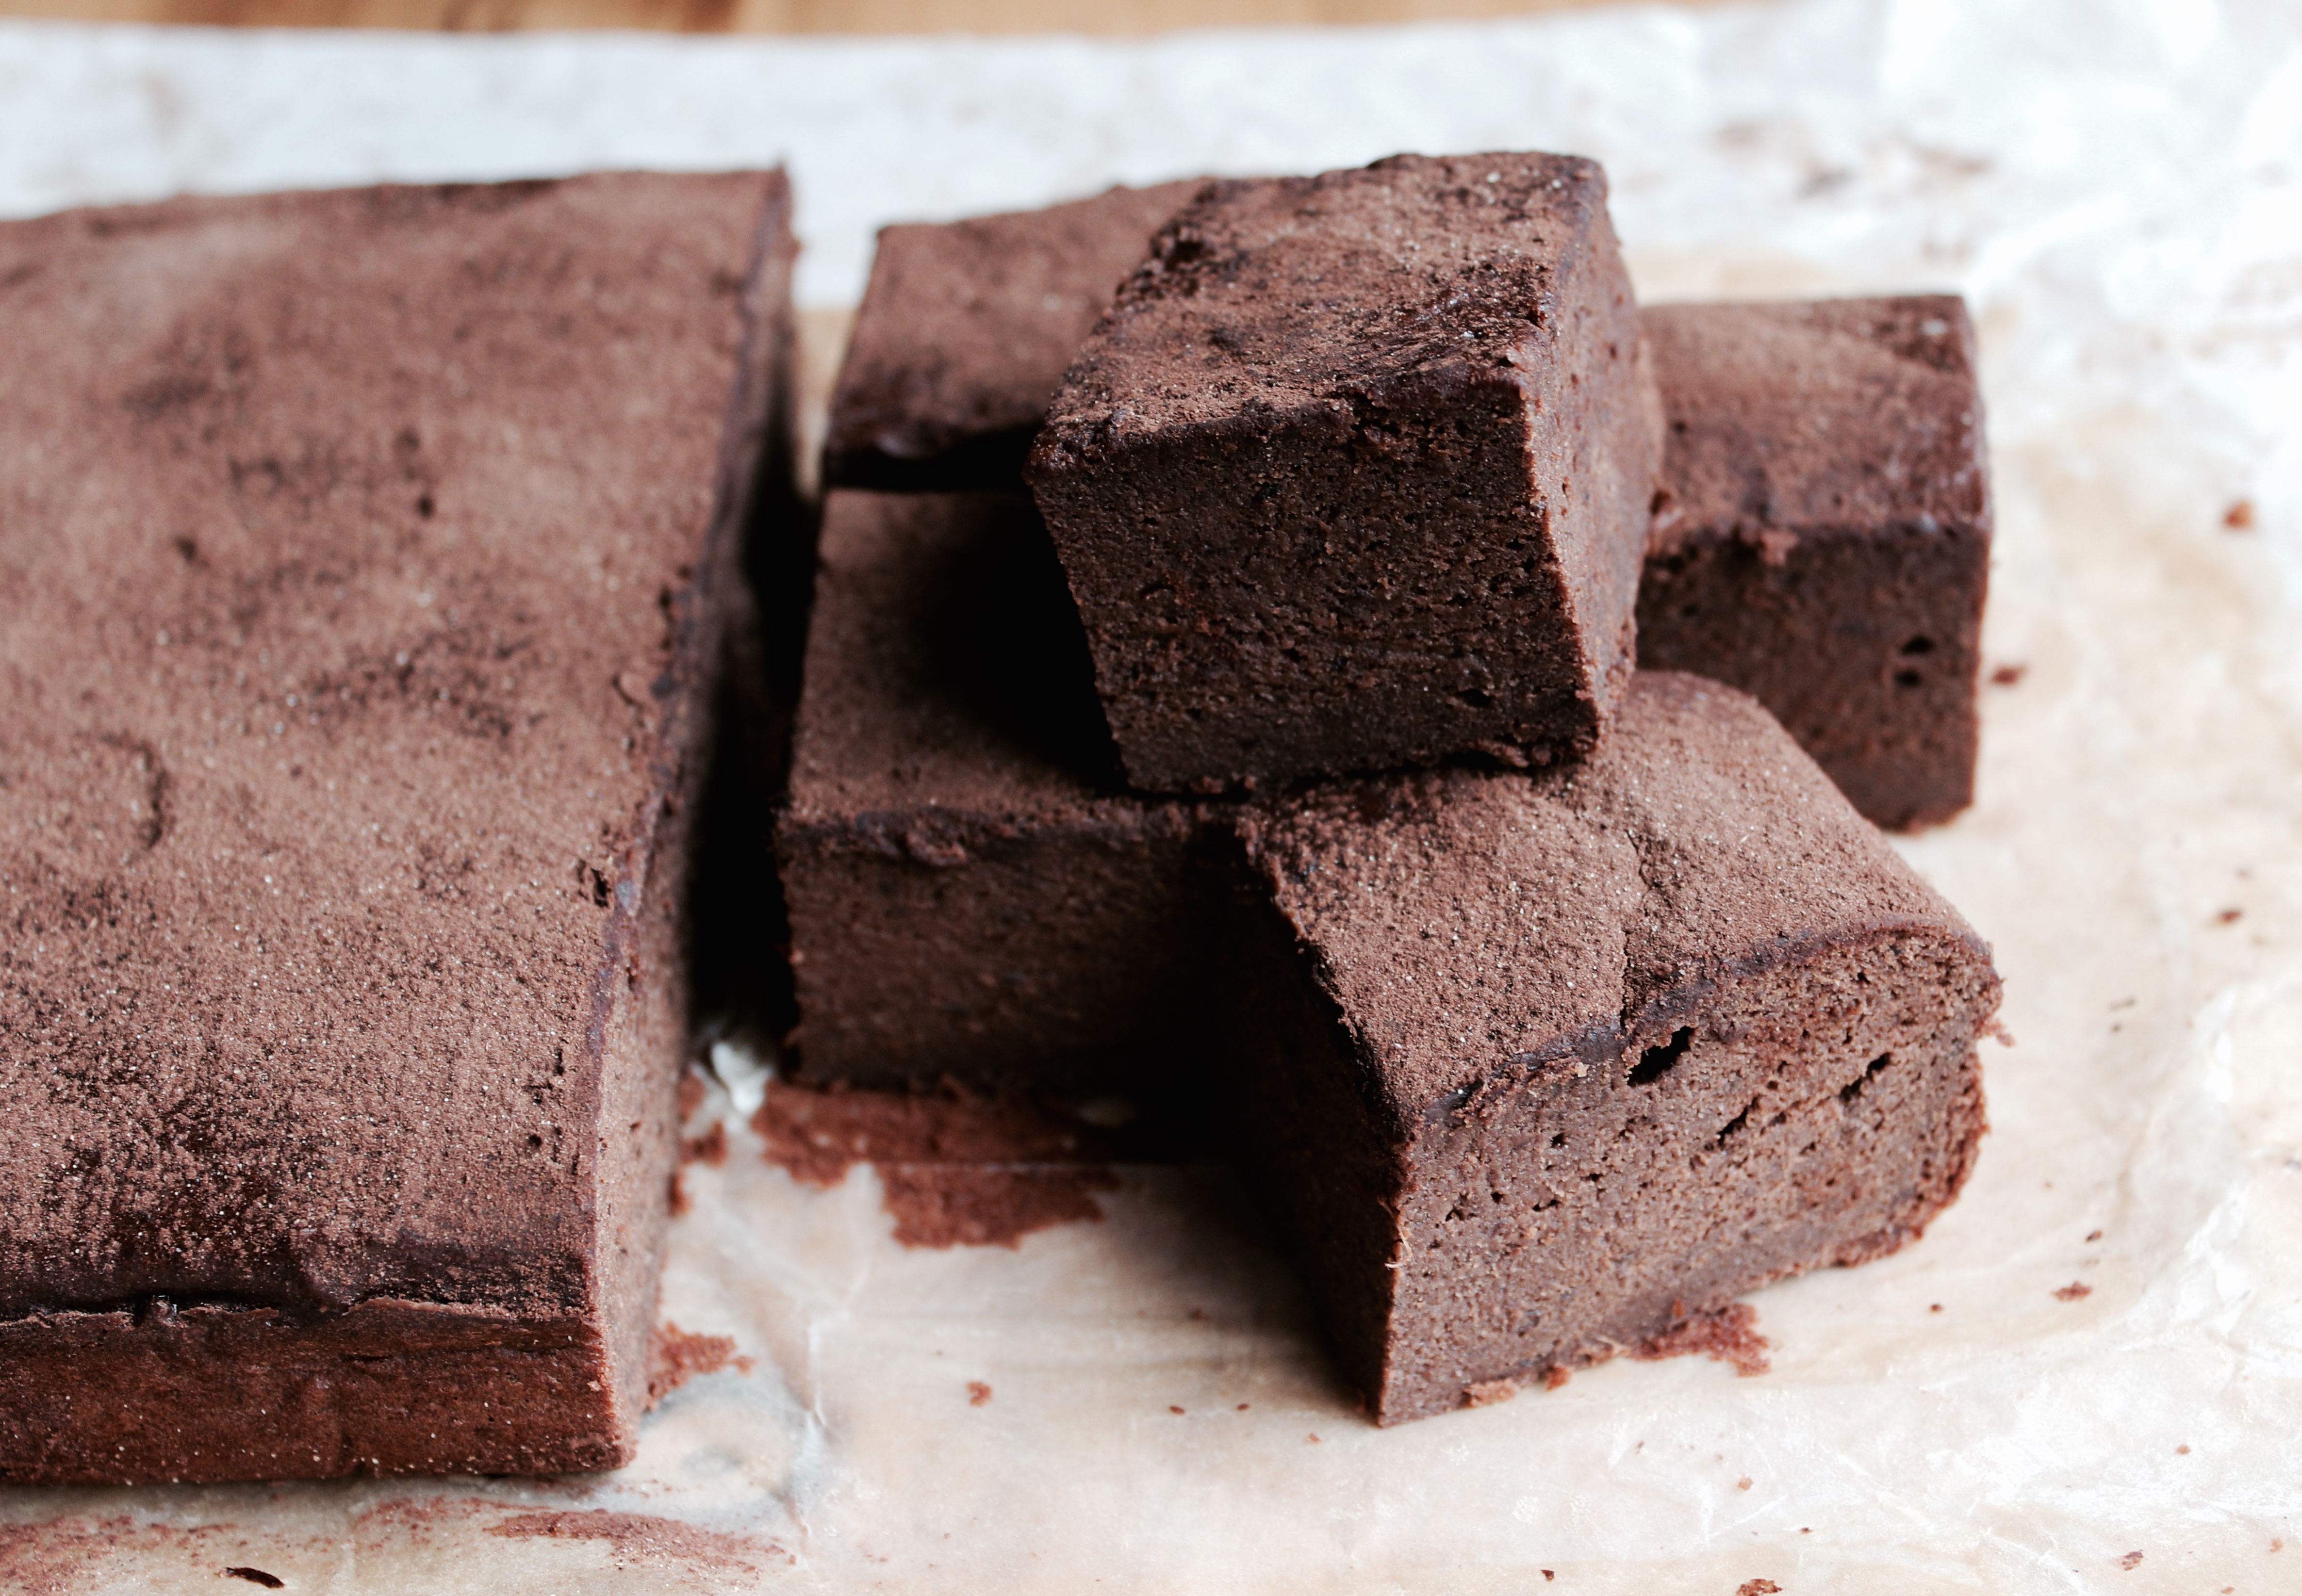
The idea for these brownies popped into my head while working on one of my assignments. 

Inspired by a recipe from Bourke St Bakery, I wanted to make a brownie that was moist and chocolatey, but didn’t have the normal 2 cups of sugar that are in most brownie recipes. 

The chai-soaked prunes are the star of this recipe – whilst you can’t actually taste the prunes, they are what makes these brownies ultra moist and sweet. The longer you can soak the prunes for the better. Overnight at the very least, but up to 3 days if you can handle waiting that long!

Replacing butter for almond butter, normal flour for gluten free flour, using good quality 70% chocolate (with no dairy) and using rice malt syrup to sweeten it just a little means that this becomes a recipe people on restricted diets can enjoy. 

My boys LOVE these brownies, but to make it school friendly, I will need to use normal butter instead of almond butter. I think 200 grams of unsalted butter would probably work fine. 

It’s great to be baking again.

E x

Chai-Spiced Brownies (gluten free, dairy free, low sugar)
A moist chocolate brownie with a hint of spice from chai tea.
Write a review
Print
Ingredients
  1. 1 1/2 cups pitted dried prunes
  2. 1 chai tea bag
  3. 250 gram jar of almond butter
  4. 200 gram 70% or 85% good quality dark chocolate, chopped
  5. 1/2 cup rice malt syrup
  6. 4 eggs
  7. 1/2 cup gluten free plain flour
  8. 1 teaspoon baking powder
  9. 1 teaspoon vanilla extract or essence
Instructions
  1. Place prunes in a heatproof bowl with the chai tea bag.
  2. Pour enough boiling water over to cover the prunes, no more than 2 cups.
  3. Remove the tea bag after 5 minutes.
  4. Cover with cling wrap and sit at room temperature for 2-3 days.
  5. Preheat oven to 170 degrees celsius.
  6. Line a rectangular slice tin with baking paper.
  7. Place chocolate, almond butter and rice malt syrup in a bowl over a saucepan of simmering water. Stir until chocolate is melted. (This mixture will be stiff and not 100% smooth, but it doesn't matter.)
  8. Place prunes and soaking liquid in a food processor, add the chocolate mixture and blitz for a few seconds till smooth.
  9. Add eggs and blitz till combined.
  10. Add remaining ingredients and process for 1-2 minutes.
  11. The mixture will be mousse-like and quite thick.
  12. Pour into tray and bake for 35-40 minutes, or until risen and it springs back when pressed lightly.
  13. Cool in tray for 15 minutes.
  14. Enjoy warm or at room temperature.
Notes
  1. This will keep for a few days in an airtight container.
  2. Place in fridge to extend it's shelf life, but eat at room temperature or slightly warmed for maximum flavour.
Adapted from Bourke St Bakery Cookbook
cook fast eat slow https://www.cookfasteatslow.com/

Apple and Almond Cake (gluten free, dairy free)

These school holidays came and went in a whirlwind of park visits, skateboarding, basketball, soccer, play dates, bush walks, camp fires and bike rides.

It is my pleasure and joy to be raising three gorgeous humans who need enormous amounts of physical activity each day. It’s like constantly moving is their oxygen and absolutely essential for their survival. 

I am a slow learner, however, and always start off school holidays in the exact same, girly way.

“Boys, lets stay in today. Let’s have a PJ day, watch movies, play with toys, sip hot drinks and catch up on how each other is going. It’s been such a busy term, let’s just go slow today.”

This works NEVER.

And I am declaring it publicly so that you will remind me before the next holidays roll around NOT TO DO THIS AGAIN.

By 9.30am on Day 1 of holidays, I have ordered all cushions back on lounges instead of being used as weapons, I have yelled things like “please get off your brothers head/please take the ball outside/please stop yelling at each other/the house is not a gymnasium/get that skateboard outside/no, you cannot have WIFI yet/you can’t shoot water guns inside/stop swinging on the chair/I asked you to get off your brothers head.”

And then, we all get promptly dressed, pack the car with bikes, skateboards, RC cars, basketballs and soccer balls and head to the park. 

Peace at last. 

After a couple of days we did get into our holiday rhythm and enjoyed time with extended family and friends amongst many activities.

As exhausted as I am at trying to keep up with them during holiday time, I realise these years with our boys are precious as we make memories and experience stuff together. I know I will look back on them with fondness, remembering the time spent together more than how tired I felt. I hope so anyway.

One of our favourite days was spent with friends picking apples at an orchard. I felt like a real country bumpkin in my cowgirl boots, carrying my red bag and filling it with all types of apples, while recipe ideas swam through my head. Meanwhile the boys ran, climbed the trees to get the best apples, jumped on tractors, ran some more and picked as many apples as they could.

11 kilos in total.

Yes folks, this is the first of a few recipes coming your way with apples as the star ingredient. 

I think Apple Picking may indeed become an Autumn school holiday tradition in our house. 

This very simple, one bowl cake from the Healthy Chef, Teresa Cutter, has minimal ingredients and is a moist, almost friand-like cake. It’s beautiful warm, and if you can have dairy, served with cream or custard.

As school went back today, I thoroughly enjoyed making it, eating it slowly, still warm from the oven and then opening my computer and writing about it. And I did all of that without uttering one word. 

I feel better already. 

IMG_8404


Apple and Almond Cake (dairy free and gluten free)
Serves 8
An apple and almond, friand-like cake, with a hint of orange and honey.
Write a review
Print
Prep Time
10 min
Cook Time
50 min
Total Time
1 hr
Prep Time
10 min
Cook Time
50 min
Total Time
1 hr
Ingredients
  1. 2 cups (200 grams) almond meal, (or hazelnut meal)
  2. 1 teaspoon baking powder, gluten free
  3. 1/4 cup light olive oil
  4. 1/4 cup honey
  5. zest of 1 orange
  6. 2 eggs
  7. 1 teaspoon vanilla extract or paste
  8. 1 large apple, peeled, cored and finely diced
  9. flaked almonds to garnish
Instructions
  1. Preheat oven to 160 degrees celsius.
  2. Line a 16cm or 20cm round baking tin with baking paper, on the bottom and sides.
  3. Combine almond meal, baking powder, oil, honey, eggs, zest and vanilla in a mixing bowl and stir to thoroughly combine.
  4. Fold in the apple.
  5. Press into the tin and scatter with a handful of flaked almonds.
  6. Bake for approx 50 minutes, or until golden and the middle springs back when pressed lightly.
  7. Let stand in the tin for 30 mins to cool.
  8. Enjoy warm or at room temperature.
Adapted from The Healthy Chef
cook fast eat slow https://www.cookfasteatslow.com/

Chewy Dark Chocolate Chunk Cookies with Sea Salt (gluten, grain and dairy free)

When you read the ingredient list for these cookies, you can’t possibly believe that they turn out as good as they do. 

A weekend baking treat for those who live on restricted diets for health reasons, or for anyone who wants to try a different method of baking, without using flour or grains of any kind. 

The sugar used in this recipe is coconut sugar, but if you wanted to make them and you don’t have it, you can substitute raw sugar. Coconut sugar is currently trending as a sugar that is ‘not refined’ and therefore better for you than refined or processed sugars. At the end of the day, it’s still sugar and we shouldn’t be eating heaps of it. If you have blood sugar problems, then these biscuits are still probably not the best thing for you.  However, compared to store-bought biscuits and other recipes, these are overall lower in sugar.

To make these dairy free, you just need to use a good quality 70% – 85% dark chocolate or a dairy free chocolate that is available in most supermarkets these days. 

They are loved by all in this house…the only issue is this recipe makes approx 13, which means they don’t last long for a family of 5!

This recipe is from www.slimpalate.com 

Chewy Dark Chocolate Chunk Cookies with Sea Salt
Serves 12
A chewy chocolate cookie that is gluten, grain and dairy free
Write a review
Print
Prep Time
5 min
Cook Time
12 min
Total Time
17 min
Prep Time
5 min
Cook Time
12 min
Total Time
17 min
Ingredients
  1. 1 cup almond butter (this can be purchased in the supermarket in the Health Food section or speads isle)
  2. 3/4 coconut or raw sugar
  3. 1 egg
  4. 1 egg yolk
  5. 1 1/2 teaspoons vanilla extract
  6. 1 teaspoon baking soda (bi-carb soda)
  7. 1/4 teaspoon salt
  8. 100 grams good quality dark chocolate, chopped into small chunks
  9. sea salt for sprinkling
Instructions
  1. Preheat oven to 180 degrees celsius.
  2. Line 1 large baking tray with baking paper, or 2 smaller trays. The biscuits need room to spread.
  3. Place the almond butter in a medium size bowl.
  4. Whisk together the egg and egg yolk in a separate small bowl.
  5. Stir the sugar into the almond butter, then add baking soda, salt and vanilla and stir until thoroughly mixed.
  6. Add the egg mixture and stir again.
  7. Fold through the chopped chocolate.
  8. Place a heaped dessert spoonful of mixture into the palm of your hand, roll into a ball and place on tray. Lightly flatten.
  9. Bake in the oven for 10-12 minutes. They will be ready when they are slightly golden, firm on top and have spread.
  10. Remove from oven, lightly sprinkle the top of each cookie with sea salt and leave to cool for 10 minutes on the trays.
  11. These will last a couple of days in an airtight container.
Notes
  1. The Almond Butter I use for these cookies is the Macro brand from Woolworths and is called Almond Spread. The ingredients is 100% raw almonds.
Adapted from Slim Palate
cook fast eat slow https://www.cookfasteatslow.com/

Avocado & Basil Pesto Potato Salad (dairy free)

Potato Salad. It appears at nearly every BBQ or Christmas gathering in some form or another.

I have had to think outside the square with creating a Potato Salad my boys would eat as they don’t like mayonnaise.

Thankfully, this one is loved by them all. The ‘creaminess’ that you want in a good potato salad is achieved by using one of my favourite foods – avocado. Add a few other ingredients to it and you have a healthy way of adding flavour to your potatoes without all the nasties that store-bought mayo can have in it.

IMG_7464


Crispy pancetta adds a crunchy saltiness that the dish needs, and then the tomatoes are just so yum and add colour too.

This is where you can play around. Use regular old bacon and fresh tomatoes if you prefer. Or leave out the pancetta altogether to make it a vegetarian meal. If you were to do that, I would add some toasted almonds to the top to add the crunch factor.

I think we have all eaten a BAD potato salad before. There are a few really simple rules to follow, no matter what type of potato salad you are making:

  1. Choose the right potato – look for a waxy potato like Desiree, Dutch Cream, Kipfler, Nadine or Nicola. They have less starch than other varieties and hold their shape nicely when they are boiled. There’s nothing worse than a mushy potato salad.
  2. Cook them in cold water that is brought to the boil, rather than adding them to boiling water. Also, be careful not to over cook them. You want them soft to eat but to still hold their shape.
  3. ‘Dress them’ with either a small amount of oil or vinegar when they are warm so they absorb some of that flavour.
  4. Potato Salad is almost always best eaten at room temperature. Cooked potatoes can go very hard once they have been in the fridge too long.

Happy Cooking!

IMG_7471


Avocado & Basil Pesto Potato Salad (dairy free)

  • Prep Time: 5m
  • Cook Time: 20m
  • Total Time: 25m

Ingredients

  • 1 avocado
  • 1/2 cup fresh basil leaves
  • 1/4 cup slivered almonds
  • 1 clove garlic, crushed
  • 2 tablespoons olive oil, (plus 1 tablespoon extra for potatoes)
  • juice of 1/2 lemon
  • 1 kilogram dutch cream potatoes, washed and halved (or left whole if they are baby sized)
  • 100 grams pancetta
  • 150 grams semi-dried tomatoes
  • chopped chives for garnish

Method

  1. Place the potatoes in a large saucepan and cover with cold water. Over a medium heat, bring to the boil with a lid on. Boil for 12-15 minutes until the potatoes are soft but not mushy. Drain in a colander, and then put the potatoes back in the saucepan. Pour 1 tablespoon of olive oil or basil-infused olive oil over them. Set aside to cool slightly.
  2. Place the avocado flesh, basil, almonds, garlic, 2 tablespoons of olive oil and lemon juice in the food processor and process till smooth. Set aside.
  3. Heat a non stick frying pan over medium and cook the pancetta until golden and crispy. Drain on paper towel and finally chop.
  4. When almost ready to serve, mix the pesto through the potatoes. I find this easiest to do in the large saucepan.
  5. Place the pesto potatoes in a serving bowl and add the tomatoes, crispy pancetta and chives.